How to Get Your Lazy Horse to Go Without a Fight!

If you have been riding long enough, you have probably realized there are basically two types of horses: those you must constantly hold back, and those you must constantly push forward. It seems very rare indeed to find a horse with a natural balance of forward energy and a quiet disposition. It is, in essence, our job as riders to help our horses become more consistent under saddle. This article focuses on a few strategies to help get a better, quicker response from hard to motivate (aka lazy) horses without excessive force.

There is nothing more frustrating than a horse that just won’t go when asked! Most of us have ridden one that defiantly refused to move any faster than a walk no matter what we tried. Or one that wouldn’t move at all, and simply balked before the ride even started! Some only work when you carry a crop as a constant threat, resort to solid thumps against their ribs, or wear and misuse  spurs. At some point, even these methods lose their effectiveness as the horse begins ignoring them. Others escalate to more dangerous behaviors such as bucking, rearing, and attempting to bite their rider when they are pushed to work. Obviously this isn’t fun ( or safe) for either horse or rider!

Let’s take a minute and talk about different reasons for a sluggish horse. Then we will examine a few simple methods to achieve a willing and responsive riding partner.

The Reasons for an Unwilling Horse

As always, I will start with a basic disclaimer for all behavioral issues. Pain,  whether from ill fitting or incorrectly adjusted tack, a sore back, teeth, hooves, or arthritic joints, can cause an unwilling horse. Please check these things first.

The most common reason for an unresponsive horse is a lack of proper training. They were most likely kicked until they moved forward as a green horse. Over time, less experienced riders didn’t ask for forward movement with a light squeeze and continued to kick them for every transition of every ride. The constant kicking eventually dulled the horse’s responsiveness. These horses are not disobedient but more aptly described as desensitized. They become lighter to the leg aids with simple exercises by a consistent rider. There are even ways to help them become more responsive from the ground.

Other horses quickly become bored and unmotivated. They tend to be very confident, intelligent, calm animals in general. Unfortunately, their calm demeanor often means they end up being owned or used with less confident riders. Their intelligence means they quickly become frustrated with repetitive arena work and beginning riders,  and learn to defy their riders’ requests.

The key to unlocking their potential is positive reinforcement. No amount of force will motivate these horses. In fact these are often the ones that become dangerous when pushed. You have to encourage them to want to do what you ask. When dealing with these types, I have found clicker training to be a great way to make riding fun again for them! Please see my article on clicker training for some methods and resources to try with these types of horses.

                                                  Methods for a Responsive Horse

In my late teens and early twenties I  retrained spoiled horses. Despite an intense love for riding, I had a very limited budget. I soon found that many horses could be purchased inexpensively because they had bad habits. In time I got pretty good at retraining horses others couldn’t or wouldn’t ride. In the process, I learned a few strategies to overcome common issues without abuse.

I will start with a simple method you can use from the ground. You will need a halter, long lead line (10-12ft is ideal) and a long dressage whip or stiff natural horsemanship type stick. I find the stiffer natural horsemanship stick without the string attached works better for this exercise. Stand with your horse next to you, the lead rope in the hand closest to your horse allowing plenty of slack , and the whip/stick in the other hand. Tap the horse against his ribs (right where your leg would lie while riding) with the whip lightly once, (pause) twice, (pause) and on the third time increase the pressure to a light swat. Continue swatting until they make any move forward. Make sure you are near the horse’s shoulder in case he gets startled and jumps forward or kicks out.

This exercise can be done facing the horse’s side as if lunging if you  worry they may kick out. Make sure to give them enough room to move forward on the lead and  stay closer to the front of the horse out of their kick zone. In this position, you can tap the ribs or the top of the back where the rider would sit lightly (don’t swat their spine though).  Always reward and praise any forward movement by your horse.

Repeat this exercise until your horse moves off the first light tap. The key is to always start with the lightest tap and only get harder if they don’t respond. Allow them to walk with you for several strides before you stop, then ask again. Most horses learn this very quickly and it transfers well to the saddle. I often carry the dressage whip for the first few rides back to remind them of the new exercise. I start with a gentle squeeze of the thighs and calves, followed with the tapping of the whip.

The next method is a ridden variation of the ground exercise. This one is commonly used by show jumpers to encourage an immediate go from a rider’s aids. I originally observed this done in warm up rings at the local horse park where I frequently ride.

Apply a light squeeze with your legs (no kicking), and take the slack out of the reins with one hand raising it slightly above the mane. Hold the excess rein in the other hand. Start swinging the excess rein from one side of the neck to the other, slapping their neck or shoulder very lightly at first. Increase the intensity of the slapping slowly while keeping the same rhythm until the horse moves forward. Accept any forward movement, whether a walk, trot, or canter. Allow them to continue a few strides before stopping and starting over from the beginning.

Do this in a small space like a round pen or riding ring so you don’t have to be concerned about where your horse is going. The key to this exercise is making each move distinct and deliberate. Always start with the squeeze, lift the rein right above the neck, then start slapping lightly with the reins. Stop swatting as soon as you get forward movement.

Your horse learns to avoid that annoying slapping by moving as soon as he feels the squeeze of your thighs or you lift and collect your reins just above his neck. Some horses learn to go as you pick up your reins without needing a squeeze. They can then be trained to change gaits from walk to trot, or trot to canter, by simply lifting your hands up and forward.

Remember to refine the training first at a halt asking for walk, then repeat at a walk asking for a trot. Insist on a consistent response at these gaits before you ask for a canter. Obedience is a habit. Speed should only be asked for after they have mastered a light and calm transition.

These methods have helped me  retrain countless horses over the years. Some  were deemed too dangerous to ride. With a little consistency and patience these strategies can help you achieve a lighter, more responsive horse as well!


5 Reasons to Try Clicker Training with Your Horse

Clicker training has long been a controversial subject among horse owners. There are some that equate it with bribing the horse for obedience. They believe a horse should learn through the classical methods of pressure and release, and repetition. Giving treats for work will surely cause a pushy, disrespectful monster. Others say only the tree hugging, new-age hippies who don’t even ride their horses use it. It is a waste of time, only good for training a few tricks.

Unfortunately, the vast majority of owners with these strong opinions have never tried clicker training themselves. They have probably never even seen it done with a horse in person. They are truly selling themselves (and their horses) short by not giving this versatile training tool a try.

Let’s look at a few reasons why you should at least consider clicker training with your horse!

It’s Fun and Engaging for the Horse

Let’s face it, our horses don’t get much say in what we do with them. I am not suggesting that caring owners force their horses to work in cruel conditions, or with inadequate care. However, we do impose our will on them when we show up, take them out of their pasture or stall, and ride them. If we were to ask our horses whether they would like to come with us and work, or continue hanging out with their herd mates, most of us already know the answer. As a matter of fact, we have probably all had a horse answer that question by playing “catch me if you can” in the pasture. So how can clicker training make work more appealing to our horses?

When we go to work everyday, we do it as a means to an end. It’s expected that we are getting paid for our time. What if we showed up on time, worked hard to do what our boss wanted, but never got our paycheck? Even if we absolutely loved our job (as some horses do), it would become increasingly hard to stay motivated. At some point, you would start to resent this one sided arrangement. Our horses are no different.

Clicker training changes the game for your horse. Not only do they have an opportunity to earn a “paycheck” for their efforts, they get the chance to use their brain and figure out what you are asking. You become much more interesting to them. Once they understand how to earn their rewards, they become willing participants. I have seen profound changes in a horse’s attitude when he starts to see himself as your partner.

My Spotted Saddle Horse Gelding, Indy, was one of those horses. When he first came here two years ago, he was a dangerous and aggressive animal. ( In fact, I was his 4th owner in 5 years- he was given to me) Whatever he had experienced in his past had left a deep distrust in humans. He displayed strong defensive aggression, including charging, striking, rearing, kicking, biting, and bolting.

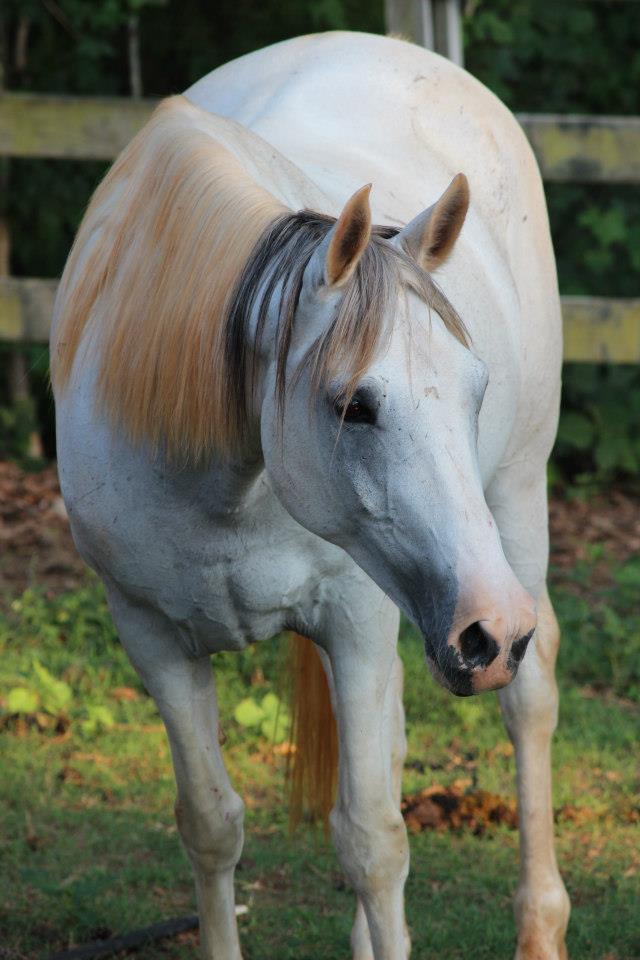
(This was his general attitude before we started clicker training!)

After I established I could protect my personal space without being abusive toward him, I tried something new.  I taught him to target, and touch items with clicker training. Then I taught him to come to his name. Within a week, his attitude towards me, and people in general, changed! He began meeting me at the gate, ready to play this new game! I continue to play with clicker training with Indy, even doing it at liberty. This way he chooses whether or not to participate. He has become a safe riding horse that even my children can handle!

(And this is him now, meeting me at the gate to see if we can play. And it isn’t even feeding time!)

It’s Versatile

This is the best part of clicker training! Once you have the basics down, it can be used for almost anything. Some examples are training them to pick up their feet easily, load better, stand still for mounting, help them become less spooky, get cleaner transitions, lead changes, and more. The possibilities are endless.

My first experience with clicker training was several years ago. I had just bought my Rocky Mountain Gelding, and he had a dangerous habit. Any time you tried to mount, he jumped into a gait as soon as he felt your weight in the stirrup. Normally I would just circle him until he stopped then mount, but he was nervous and that seemed to make it worse. Since he was the typical “cowboy” trained horse, I decided to find a way to train a calm, relaxed mounting routine.

I read a book about clicker training a few years back, and how it was used by zoos to make physical examinations and general handling of their animals safer. I wondered if the same techniques could work with a horse? After some digging, I found a few books about using clicker training with horses.

After teaching him how to target and touch objects, I taught him to line up next to a mounting block. He did that well, but he still stepped off as soon as he felt weight. So I decided to teach him to lower his head on command. I would place my hand on his neck near his withers, and gently put downward pressure on his halter. When he moved his head down, I would click and treat. Once he had that behavior down, I asked him to lower his head after lining up at the mounting block. When he did, I clicked and rewarded him. All I had to do when I mounted was put my hand on his neck and he stood quietly with his head down until I asked him to walk off. Best of all, we accomplished this without force, and he learned how to be calm in the process. He still does this today.

It Makes You a Better Trainer

Training requires timing, feel, and patience. Whether you know it or not, every time you interact with your horse you are training. This means you are either sharpening or dulling the horse’s skills every time you handle him! The best trainers have naturally excellent feel and timing. That’s why they develop  great horses quickly without unneeded force. Think Ray Hunt, Tom Dorrance, and Buck Brannaman.  However,  there is hope for the rest of us! With practice most owners can learn better timing. Clicker training can help.

Clicker training helps you to slow down and watch your horse. You have to watch closely, and click the behavior you want to reinforce. This means you must wait for your horse to figure out what you want. Timing is very important in clicker training. If you click too late, you reinforce the wrong behavior. Your horse will try different behaviors to see if that is the one you want. You must patiently wait until he stops offering other behaviors, and click the instant he does (or attempts to do) what you are asking. One short clicker session can easily offer 20 – 50 opportunities to sharpen our timing by clicking for appropriate responses.

Another wonderful benefit of clicker training is it’s ability to help us see each horse as an individual. Horses are different, just like people. Sometimes we know only one way to train a horse. The more you experiment with clicker training, the more you will learn about your individual horses, and their learning styles. My two geldings are totally different in the way they react to clicker training. Both enjoy it, but one is very reserved and only wants to play for a few minutes. The other one never wants to stop, and offers new behaviors on his own to see if he can earn a click!

It Can Be Done Anywhere

Is your horse currently on stall rest? Is it raining, snowing, too hot, or too muddy to ride? Are you recovering from an injury that prevents riding? Do you only have 15 minutes to spend with your horse that day?

If you are dealing with any of these situations, it’s the perfect time to try clicker training. You can do it in their stall, in the barn aisle, in the pasture, really anywhere you and your horse happen to be. A session can be only 5 minutes long if you want. It can help you solve behavioral problems on the ground, or simply strengthen your relationship with your horse. If your horse is on stall rest, it can help alleviate boredom while they heal.

You Don’t Have to Carry the Clicker Forever

I have heard several people protest the idea of clicker training because they don’t want to carry a clicker and  treats every time they handle or ride their horse. I can certainly understand their concern, but the truth is you don’t have to! The clicker makes establishing the behavior quicker and easier for the horse, since it identifies a certain behavior as correct to him. He gets instant feedback (and his treat) confirming that was the behavior you wanted.

After the behavior is firmly established, however, you can replace the click with another word. I use a simple “Good boy!”. You can also start offering treats less often. Studies have shown that intermittent reinforcement is more effective long term than offering a reward every time they perform a task correctly. I very rarely give treats to my Rocky Mountain horse for his mounting skills now, but he still consistently offers the behavior.

So if you want to try clicker training here’s a list of books and tools that can get started:

This is the first one I ordered years ago. It is still one of my favorites! Here is the link :

http://amzn.to/2uAuj8N

Here is another good one:

Here is the link for it: http://amzn.to/2fBIkMM

This book combines classical training with clicker training, and has more exercises geared toward improving under saddle work, even focusing on dressage.

Here is the link : http://amzn.to/2fCm2dy

I also found this kit that comes with a clicker, treat pouch, and water bowl (it is designed for dogs, but you could use the bowl to teach targeting).

Here is the link for the kit: http://amzn.to/2fBKdsQ


Himalayan (Pink) Salt Lick On A Rope (or Hours of Entertainment!)

It has been an extremely humid summer here in Atlanta, Georgia. As a result, my horses have been consuming their fair share of salt. Towards the end of June I noticed that the old salt block had been reduced to a few broken pieces in the bottom of it’s tray. Oh great, almost time to lug that impossibly heavy salt block up the flight of stairs that lead up to my pasture, then all the way up the hill to my barn. Have I ever mentioned that my entire property is one big hill? It didn’t take much convincing to decide those few broken pieces would surely hold for a week before they would need replacing….

So, the next time I was at my local Tractor Supply picking up feed, I was reminded of the dreaded task. I literally stood in front of the pallet of unnaturally heavy cubes of salt for a few minutes, cursing this chore of horse ownership. Just before I had resigned myself to hefting one into my cart, something on the shelf caught my eye. It was a block of Himalayan Pink Salt on a rope. It was so small ( at only 7 lbs) and convenient. So I put that little gem in  my cart instead!

I rushed home and my husband helped me install it in our run in barn. We decided to hang it from a rafter with a heavy chain. I wanted to make sure it would stand up to any abuse my horses dished out, and wouldn’t be able to entangle them like rope could. I used one length of chain and tied the block (with the rope provided) to the chain. We placed it about wither height to the horses. We secured the chain to the rafter with a clamp (well out of the reach of the horses.) There are no loops in the chain or rope for the horses to get hung in.

So, how do my horses like it? They love it! They routinely play with it, and it is usually wet from licking when I feed them in the morning. It has definitely gotten smaller since we put it up. My one gelding, Indy, loves to play tether-ball with it!

Best of all, I will NEVER have to lug that old miserable block of salt up that hill again! If you are interested in trying one out yourself, here is a link:

http://amzn.to/2vfYyQZ


Ariat Terrain Paddock Boots

These are my favorite boots of all time!  I am seriously on like my 10th pair of these (over a 15 year period). They are so comfortable that I find myself wearing them when doing non horsey things as well, like hiking with the family or going out in rainy weather. (Did I mention they make a waterproof version?)

The best part about the Ariat Terrains is the way they fit. They feel like a cross between a boot and a sneaker. I can take a new pair straight out of the box, and they don’t need a break in period! That’s pretty awesome considering most other boots have me limping around for a few days at least!

They are very lightweight and have a flexible sole. The heel is perfect for safety when riding, but also low enough to be comfortable while doing barn chores. I can wear them all day and my feet will not be fatigued. The sole has some tread as well, which if you grew up wearing some of the old school roper-type paddock boots, you can agree is an important feature! I can remember many times slipping and falling because of those slick soled boots on dewy pastures. The Terrains offer much better traction around the barn.

Here is a link to the basic (non waterproof) version:

http://amzn.to/2vB0Wmd

And as mentioned above, they come in a waterproof version! Wet feet are definitely on my top 5 most annoying things list, above waiting all day for the cable company, getting my license renewed at the DMV, or sitting in Atlanta traffic. I really hate wet feet! These boots keep your feet nice and dry through dew, mud, and even puddles. All  without the uncomfortably hot and sweaty feeling of rubber rain boots.

Here is the link for the Terrain H20 (waterproof) version:

http://amzn.to/2fpekU0


Now you know why I love these boots so much, and you won’t be surprised to see me wearing them on a rainy day at the grocery store!

Fly Spray That Actually Works Despite Humidity, Rain, and Sweat!

Flies, gnats, and ticks. These tiny creatures  wreak havoc on our horse’s sensitive skin, spread diseases, and irritate both horse and rider to no end.  You have likely battled a cloud of gnats , been bitten by a deer fly, or had your horse buck while riding because of a nasty horse fly. You understand the importance of fly spray. Both for your horse’s sanity and your safety. Unfortunately, not all products on the market perform as advertised, and they are a fairly expensive gamble if they don’t work well. That is why I am so excited to share this fly spray with you!  After many years and several different brands, I can honestly say this stuff works!

First, let’s talk a little bit about where I call home. I live in what is affectionately called “the Deep South”,  about 30 miles outside Atlanta, Georgia,  USA. Our summers are extremely hot,  and sticky with humidity. It isn’t unusual for my horses to sweat resting in the shade during the summer. The high humidity also causes regular patterns of pop up thunderstorms in the evenings. Sometimes we get showers every evening for weeks. The warm temperatures here also mean that we have flies from early April to late November, and sometimes even into December. The conditions are perfect for breeding flies.  Between the sweat and the rain, it also makes keeping fly spray on your horse a full time job.

Now, let’s talk about my horses. I currently own two geldings, a 16 year old Rocky Mountain Horse and a 10 year old Spotted Saddle Horse. The Rocky Mountain Horse, Whiskey,  is very sensitive to insect bites. Whether flies, ticks, or even ants, he swells up pretty badly when bitten by anything. Here is an example of what happened after he rolled in an ant bed:

(Note the sweaty shoulder from the humidity, he was just hanging out in the pasture. Excuse the dirt, he was due for a bath too!)

He is also a clumsy, or too curious for his own good,  horse. That means he usually has a scrape or a cut somewhere in his body. Keeping his cuts free from flies while they heal is important to me. And then there’s my other horse, Indy. He is on an eternal quest to become a solid colored horse by applying copious layers of mud and dirt to every inch of his body. This is what he looked like this morning:

So now you know what I am dealing with, and why an effective fly spray is such a big deal to me!


Many commercial fly sprays claim to work two weeks or more per application. Even in ideal conditions (i.e. no sweat, rain, baths, or dirt), I find that hard to believe. Most last through only one sweaty ride,  a hose down, or a single rain shower. If you have multiple horses, this simple expense adds up quickly. Add our long fly season into the equation, and it can end up costing me hundreds of dollars a year to protect my two horses if I have to reapply the spray frequently!

I tried several homemade fly spray recipes first to save money. I didn’t find them effective, and worse yet, they left a greasy film on my horse’s coats. Indy was thrilled with the oily residue though, it really helped his mission to remain dirty! I went back to my old standby, Tritec. It usually lasts a few days, unless I hose them down, or they get really sweaty. It is also pretty expensive.

Then one day, I went for a trail ride with a friend. As we were tacking up, I realized I had left my fly spray at the barn. She lent me hers. If you have ever borrowed a friend’s fly spray, then you will know what I am talking about when I say I applied it sparingly. After all, that stuff is a valuable commodity. So after lightly misting my horse while my friend watched my usage intently, we hit the trails.

We rode for a few hours, and we were undisturbed by the clouds of gnats near the riverbeds. Even the horseflies that flew up to us,  quickly flew away without trying to land. I was impressed. After the ride, we hosed down our horses, then took them to a sand round pen and let them roll. (their favorite reward after a ride). The next morning, I noticed I could still smell the fly spray. Even with that light application, a hose down, and a roll in the sand, it continued to work for a few days. Needless to say, I bought some for myself!

The bottle says up to 14 days protection, but I realistically get a week to 10 days on average from one complete application. I also love the smell. It smells like citronella. It has definitely saved me money too! I buy the large container, and simply reuse one of the spray bottles.  If you are interested in trying this fly spray you can find it here: http://amzn.to/2hr6Twk

How to Get Your Horse to Stop…Easily!

There is nothing more unnerving than riding a horse that’s hard to control. It’s difficult to relax and enjoy yourself when you aren’t confident your horse will stop when asked. So how can you get a resistance free stop from your horse without reaching for a bigger, stronger bit?

First, let’s look at a few reasons that cause a horse to ignore or even fight your requests to stop.

Lack of Training

This is an all too common reason for what some mistake as disobedience. A surprising number of horses start their training with an amateur owner. Their owner probably had the best intentions, however, possibly lacked the feel and timing to develop a soft and responsive horse.

A green horse needs a clear release of pressure for correct responses to understand its job. The first few rides, the young horse will not understand any cues well, and it is sometimes necessary to use stronger than usual pressure on the reins to guide and stop the horse.  This is normal. As the horse progresses in his training, it is the rider’s responsibility to apply less pressure to the horse’s mouth to navigate and stop. The horse should learn to listen to seat and leg aids first. Eventually they should need only light guidance and contact with the reins.

Unfortunately, many riders never learn to use their seat and legs more, and rein pressure less. They continue to pull their horse around with the bridle. The horse doesn’t learn how to be lighter in the bridle, and the force used to control the horse damages it’s sensitive mouth. Now the horse becomes desensitized to the pressure and even less responsive. Sadly, when this happens many people do reach for the bigger (or twisted wire mouthed) bit. Leverage bits and severe mouth pieces often provide better control, for a little while, due to the increased pain they can inflict with heavy hands. The horse may begin to ignore the stronger bit after some time, or may start rearing, bucking, or bolting to evade the constant painful pressure.

Pain

I am not going to spend a lot of time on this subject. As horse owners, we know that ill fitting tack, poor farrier care, lack of dental care can cause pain. A horse that is in pain will not think clearly, and may be too focused on finding relief to be obedient. Think about how hard it would be to do your job if you had tacks in your shoes! Check the saddle and bridle fit, talk to your farrier about possible issues with soreness, and have a vet perform a soundness exam and float their teeth.

Excitability

If a horse has not spent enough time learning how to respond lightly in a controlled atmosphere, it becomes increasingly hard to handle in exciting new environments. The key here is to have consistent responses at home before expecting obedience in competition or on the trails. When a horse is worried about it’s surroundings, it’s adrenaline will rise. The instinctual fight or flight response overpowers any incomplete training, and results in a horse who fights it’s rider or spooks dangerously.

Here’s the point. As owners and riders, it is our responsibility to make riding as enjoyable and stress free as possible for our equine partners. This takes time and consistency.  When we do our job well, we will have a reliable horse that doesn’t require a harsh bit to control. So let’s look at a few easy ways to help your horse understand his job without unnecessary force.

Stay Safe

If you are retraining a horse that doesn’t stop well, make sure you are in an enclosed space. A round pen or riding ring will work well. Also, make sure you are wearing a helmet.

Put Away the Big Bits

Go back to a simple bridle or bitless option. A french link snaffle with a smooth mouth, a sidepull, gentle hackamore, or even a halter can be used here. Your goal is to give your horse the opportunity to respond without the fear of serious discomfort. Take a few minutes to lead your horse around in the new tack. Ask him to stop, back, and flex laterally in hand before mounting. If he fails to respond to your requests on the ground, take the time to get him comfortable with those simple tasks before riding him. ( If you know someone who can show you how to ground drive, it’s an excellent exercise to help retrain a horse ) . You are building a foundation. Make sure you don’t rush it!

Go Back to Basics

Once you feel your horse responds well on the ground, it is time to mount up. Remember to stay in your enclosed, safe area and have your helmet on. Start at a walk, and remember that old habits die hard. Your horse may still have anxiety about riding and anticipate pain when asked to stop. Calm, consistent repetitions will help reshape his behavior.

When working on these exercises, I like to introduce a new cue to the horse. I personally use a slight shift of weight back in the seat with a light bracing of the back. Really, I just slightly resist following the horse’s movement for a stride before applying pressure to the reins and verbally saying “Whoa!”. Only use as much rein pressure as needed to stop. The key here is not to pull back on your horse. Don’t engage in a tug of war! Even if he doesn’t stop immediately, maintain steady pressure and wait. When he does stop, release and praise him. Repeat this pattern at a walk until the horse starts to respond to the weight shift and stiffening of the back before you need the reins.

Keep these lessons simple and stress free. If your horse acts up or gets startled, bring him back under control with a one rein stop. Always end on a positive note.

When your horse reliably responds to light cues at a walk, move up through all gaits testing his response in that enclosed space. If he gets strong or relapses to old habits, go back to a walk and fix it. A solid foundation takes time. Before you know it, you will have a light and responsive horse!

But It Didn’t Work for My Horse

If you take the time and use as little pressure as needed to stop it will eventually work. Some horses simply need more help breaking free from old routines.

If I am working with a very defensive and bracey horse, I will use a gentle one rein stop at first to retrain a soft whoa. Use the above seat cues first, then gently apply a one rein stop without excessive force. Practice the stop using each rein individually.  Soon just the seat cue followed by a gentle lift of one rein should work. This method is also helpful if you want a horse to work well on a loose rein in the future.

So there you have it, with a little time and effort you and your horse can have a soft, reliable stop. And you don’t need a whole tack store full of bits to achieve it!


Little S Hackamore Vs. Flower Hackamore: Bitless Review

Like many riders today, I find myself looking for more humane ways to communicate with my equine partner. After all, riding should  be fun for both of us! I know that bitless options are often considered gentler than bits, but there’s a confusingly large selection to choose from. In this article, I will provide a review of two popular hackamores, the Little S Hackamore, and the Flower Hackamore. I will also briefly touch on a few other bitless bridles and hackamores I have used in the past. Hopefully, it will help others decide on the bitless bridle that would be best for you and your horse. Please check out my video review of The Little S and Flower Hackamore here :

The Little S Hackamore

This hackamore is very popular with endurance and trail riders. It can come with a waxed rope noseband,  leather noseband, or biothane one. The one I bought had a rope nose, which I removed because I felt it would be too abrasive. I replaced it with  leather.  It usually comes with a curb chain instead of a curb strap, however Zilco offers one with a biothane nose and chin strap.

This hackamore is a fairly gentle one. It could be compared to a mild curb bit. It seems very easy for most horses to understand, whether direct reining or neck reining. It has a clear release of pressure that makes it more pleasant than some other bitless options. Both of my horses seem comfortable with loose reins and with light contact in the Little S. This is my favorite bitless bridle by far. I feel confident using this hackamore at home and on the trails.  I use it consistently with my Spotted Saddle Horse gelding. The Little S is an excellent choice for most horses going bitless. Here is a link to find the Little S hackamore:

https://rover.ebay.com/rover/1/711-53200-19255-0/1?ff3=4&toolid=11800&pub=5575313410&campid=5338112914&mpre=http%3A%2F%2Fwww.ebay.com%2Fitm%2FREINSMAN-Stage-B-Little-S-Hackamore-Adj-%2F272699409169%3Fepid%3D1601371745%26hash%3Ditem3f7e26c311%3Ag%3Afy8AAOSwZKBZMfA1


The Flower Hackamore

This hackamore interested me because it is adjustable for different levels of control. It is not well known here in the US, but seems popular in the UK. I purchased this one from Ebay made by Zilco, , and it came with a biothane nose and chin strap.

My initial impression of the Flower Hackamore is that it rides very similarly to a simple snaffle. Unlike some bitless options, this hackamore allows for steady contact with your horse.  I will stress, however, that this hackamore needs to be almost snug on the horse’s face. You only want a finger to fit between it and their nose and chin. If it is too loose, this will happen when you try to turn using a direct rein:

After some tightening, it stayed secure during turns. I did feel like it lacked some control as compared to the Little S. It would be ideal for a sensitive horse who has solid training, or for a young horse during it’s early education in a controlled setting. I would not suggest this for a horse that tends to lean on your hands, or gets strong in exciting situations. It seems comfortable for the horse and I will continue to use it at home and in my ring. Here is a link to find it on Ebay:

https://rover.ebay.com/rover/1/711-53200-19255-0/1?ff3=4&toolid=11800&pub=5575313410&campid=5338112914&mpre=http%3A%2F%2Fwww.ebay.com%2Fitm%2FHorse-Black-Zilco-Flower-Hackamore-%2F141915028171%3Fepid%3D1129813667%26hash%3Ditem210acb7acb%3Ag%3AuY8AAOSwuxFYxodB

Jumping Hackamore

This is a leather noseband that attaches to a headstall. It is somewhat flexible but holds it’s shape. The noseband sits off the horse’s nose unless the rider engages it to turn or stop. It works like a western bosal in that way. Because of the design, it offers clear release and signals to the horse. It cannot be used to ride with contact like a snaffle for the same reason.  It is often used for jumping horses who need speed control and direction during their course of jumps, but don’t require consistent contact from the rider.  I would recommend it for a horse that relies more on seat and leg aids.

I had one of these years ago, and my Rocky Mountain gelding loved it. ( He is very naturally gaited and does not need contact to maintain gait ). Unfortunately, I left it at a friend of a friend’s barn, and have never replaced it. You can learn more about it here: http://amzn.to/2tejuIx

Dr. Cook’s Bitless Bridle

This was the first bitless bridle I tried more than ten years ago. It is a headstall that has a strap that goes over the poll (where the throatlatch would normally be), crosses under the jaw, and passes through rings on the noseband. When the rider engages the left rein, the horse feels it on the left side of the nose, under the right side of the jaw, and up to the poll. The opposite is true for the right rein. When both reins are engaged the pressure comes from the nose, under the jaw and the poll. It can be ridden with direct reining or neck reining. Contact can be achieved with it similar to a snaffle. Sometimes the pressure does not release quickly,  and it can be confusing or overwhelming for the horse.

I used this on a sensitive Arabian gelding who did not tolerate a bit well. Over time, the slow release and vise-like action caused him to start grinding his teeth and swishing his tail. These behaviors disappeared as soon as I switched him back to a bit.  For this reason, I don’t personally think the Dr. Cook’s bridle is more comfortable than a bit for sensitive horses. It has remained popular among many riders even today, however,  suggesting that many horses are comfortable in it. You can learn more about it here:

https://rover.ebay.com/rover/1/711-53200-19255-0/1?ff3=4&toolid=11800&pub=5575313410&campid=5338112914&mpre=http%3A%2F%2Fwww.ebay.com%2Fitm%2FHorse-Black-Beta-Bitless-Horse-Bridle-%2F121800780543%3Fhash%3Ditem1c5be46aff%3Ag%3AfwEAAOSwsW9YxoqY

So there are a few options to consider if you want to try bitless with your own horses!

Kids and Horses: How To Keep Them Safe While Having Fun

Summer’s in full swing, so your kids have probably been spending more time around the barn. If you grew up around horses, you likely have treasured memories of bareback rides to the lake,  racing your friends on your favorite trails, or winning a ribbon at the local show. Maybe you still have a faded picture of your first horse from years ago.  You want your kids to make memories like that. You want to share your love of nature and animals with them. However, you also understand horses can be dangerous and sometimes unpredictable. You want to prevent memories of trips to the ER, crutches, bruises, and rope burns.

What if your child is the first one in your family to fall in love with horses? Knowing some basic skills and safety guidelines to teach your child (and to use yourself), could make this the best summer of their childhood. It might lead to a lifelong relationship with horses for them and possibly the entire family. Horses teach children the value of hard work, following through with responsibility, and how to build confidence. They can also injure and even potentially kill your child.

So how do you keep them  safe while enjoying the great outdoors with the horses?

Pick the Right Horse

This seems obvious. You would be surprised how many times I have heard well-meaning parents say they were going to buy their 7 year old child a yearling so they could “grow up together”. Horses aren’t dogs. Please don’t buy your child an untrained yearling horse. Young horses need experienced handlers to train them with consistency and discipline. It takes years of good handling practices to develop a safe riding horse. There is an old phrase that goes “green on green makes black and blue!”. A green, or inexperienced child, should not be paired with a young and untrained horse.

Older horses are often ideal for young owners. Likely they’ve already been exposed to any situation your child will encounter with them. They have seen traffic, dogs, cows, motorcycles, bicycles, water crossings, flags, and lots of other spooky things. They might have competed successfully in the discipline your child wants to learn. A good horse can go a long way in developing confidence in a young rider. In addition, an older horse  being retired from active competition can often be purchased for a very reasonable price. Many owners just want to find a wonderful home for them.

Have a soundness exam done by a vet on any older horse you are considering buying. Make sure they are healthy enough to continue with the level of work they will be expected to perform. Some conditions, such as arthritis and Cushings disease, can be managed with medication. Discuss any issues with your vet before you decide if it’s the right horse for you. This prevents unnecessary heartache later on.

Horses are individuals, just like people. Some are more sensitive and reactive than others. Look for a horse that is more laid back in disposition. A horse with a friendly, gentle disposition who enjoys attention often makes a great child’s horse.  It’s also a good rule of thumb to look for a horse who has a little more “whoa” than “go” for a beginner rider. It is safer to ride a horse that stops when the rider gets confused rather than one they are always struggling to control.  As their skills increase, they can always move up to a more sensitive horse.

Wear A Helmet!

Always! More than 50% of equine related deaths are due to head injuries. Most of these deaths could have been prevented with a simple helmet. There’s a huge variety of helmets on the market today. Gone are the days of the heavy, bulky, and hot velvet riding hats. You can now get them in every color of the rainbow.  They are light weight, low-profiled, and well-ventilated. Make it a rule in your household from the start. Every time they ride! It’s really just as important as wearing a seat belt in a car.

Don’t Ride Alone

Riding alone is dangerous. even for experienced adults. Freak accidents can happen to anybody. There are people in this world looking to victimize anyone they can isolate and follow. If no one knows where your child is when things go wrong, help may not arrive in time.  Whether riding in the ring, pasture, or on the trails, they should be accompanied or watched by someone. Hopefully they have other riders in their household or at the barn to share riding time.

If you only have one horse, you should be outside and close by while your child rides. Trail rides should be arranged with other safe riders.  Alternatively, you can simply go for a walk with your child and their horse. Ultimately you are responsible for your child’s safety. Imagine how terrifying it would be to see your child’s horse galloping home without them!

Ground Skills

Learning some safety tips on the ground can prevent injuries. Proper boots with heels should be worn at all times at the barn. Heels keep their feet from sliding through the stirrups while riding. Never allow flip flops around horses. Exposed feet can be seriously hurt by a 1200 pound horse’s hoof.

They should know how to approach a horse in the pasture, stall,  when tied, and how to lead one correctly. Also the proper way to feed treats and mounting/dismounting safety should be taught.

When approaching a horse in the pasture, they should walk towards their shoulder. This keeps them out of the kick zone and safe if the horse should try to avoid being haltered by running off. If the horse is in a stall they should open the door, step inside, close the door behind them, then halter the horse. It prevents the horse trying to leave the stall before they are haltered.

Children should be taught to never run up behind a horse. A horse’s startle response is to kick. A well-placed kick can cause serious injury. The same is true when approaching a tied horse from behind. It is a good habit to talk to the horse so he knows your there if coming up from behind him. This is especially true if the horse is in cross ties. He may not be able to turn his head enough to see completely behind him.

Leading is an essential skill for anyone around horses.  Never allow them to wrap the lead rope around their fingers, because if the horse spooks and bolts, the rope can quickly sever their fingers! Children must also learn to keep the horse out of their personal space while leading. A crowding horse can easily knock down and step on a small child. They must learn to insist on good ground manners from the horse.

Children love to feed treats to horses, so make sure they understand to keep their hand flat and fingers together. Some horses get very excited about treats, and might mistakenly bite little fingers.

The last skill they should learn is how to mount/dismount safely. Over half of all falls happen during mounting or dismounting. Horses often make a habit of walking off during mounting. This should never be allowed. You should teach the child to wait until the horse is still to mount. If the horse moves, have them shorten the inside rein and circle with the horse until they will stand still. The horse should also learn to wait quietly for dismounting.

Now, let the safe memories begin!


Why Does My Horse Bite Me?

Everyone imagines a fairy tale relationship with their horse long before they actually purchase him. Bareback gallops on the beach with the wind in his mane. A happy nicker and a kind eye when you enter the barn every morning. A horse that eagerly meets you at the gate every time you call him. But what if your daydreams turn into a literal nightmare? Suddenly, you find yourself being greeted by your horse’s frequent, and sometimes successful, attempts to bite. Let’s look at some common reasons horses bite, and more importantly, what we can do to stop it!

Pain

Pain should always be the first thing you rule out if your horse tries to bite. Horses can only communicate with body language. If your normally easy-going horse starts biting when you groom, saddle, or try to ride him, there is a good chance something hurts. He is attempting to tell you in the only way he can.

Start by inspecting your tack. An ill fitting saddle can pinch his shoulders or dig into his back. A bridle that is too tight rubs his face and pinches the ears. A bit that is too loose will bang his teeth. A dirty saddle pad may contain prickly burrs or hay which can painfully dig into his back. Another common reason horses bite when being tacked up is when the girth is tightened too quickly. If your horse does this, try tightening the girth in smaller increments instead of all at once.

After you are confident your tack isn’t an issue, call the vet for a soundness check. Your horse may have painful joints or a pulled muscle in his back. Teeth that haven’t been floated consistently develop sharp points that dig into his cheeks when you use the bridle.

Some injuries aren’t easily seen. I remember a friend got a beautiful Saddlebred mare because she was deemed “crazy”. Earlier in life she had been a successful show horse. She was a friendly, gentle mare on the ground. However, if you put one foot in the stirrup,  she was frantic. She reared, spun, backed, and balked. She was drenched in sweat and trembling in minutes. On a whim, my friend had x-rays done despite showing no signs of lameness during the initial exam. It turned out that she had stress fractures in both front pasterns! That is why the lameness wasn’t immediately obvious. With stall rest she made a complete recovery.

If pain was the cause of their biting, be aware that it may take a period of time after the pain is resolved for the horse to stop being defensive. They have to understand the pain is gone and there is no need to protect themselves. Be patient and consistent and you should have your willing partner back soon.

Frustration or Insecurity

What if your trouble starts as soon as you step in the barn? Your horse lunges teeth bared at anyone who passes by his stall. He might even make contact with unsuspecting victims and their passing horses. Horses with this behavior are a hazard to everyone that frequents the barn. It can be a dangerous task just to get him out of his stall for turnout. So why does he do this, and how can you stop it?

Believe it or not, this behavior is often rooted in insecurity. A stalled horse is a trapped horse. They sometimes find the activity of a busy barn stressful. Horses naturally have large bubbles of personal space and depend on their ability to move away from uncomfortable situations. When we stall a horse, we take away that option. We simply invade their space without asking, and the only option left for a horse that feels cornered is to defend himself. Soon he starts defending his space every time someone approaches his stall. Unfortunately, most people respond with anger and aggression of their own, which only reinforces his need to defend himself. Sometimes the horse is deemed too dangerous to handle and his turnout becomes less and less frequent. This leads to pent up energy and frustration, making the situation even worse.

So how do you deal with this behavior effectively? If possible, move the horse to the quiet area in the barn. Then, take advantage of feeding time to do a little training. Stand a safe distance from his stall holding his feed bucket in view. Call his name and then introduce a simple command like “Ears up,” or “Be Good,”. Now wait until he stops making ugly faces and praise any attempts to show good manners. Step back out of reach if he gets aggressive again and wait. This might take a minute the first few times. However, he should quickly learn to allow your approach without becoming offensive.

If you have done ground work with your horse, he should back away from you willingly with hand signals. If you haven’t trained him to do so yet, I highly recommend taking a day to train this skill. Insist that he makes a nice face and backs away from his feeder calmly before you enter his stall. Once he has that down, insist on calm backing before you halter him in his stall. Take your time and don’t just barge into his space. Making this experience low key and drama free will remove the stress that started this behavior in the first place. Now that he can be handled safely, make sure he gets as much turnout as possible.

Dominance

So what if your horse is pain free but still bites you when you ask him to do something he doesn’t want to do? A simple request to move his shoulder out of your space is met with a lightning quick bite to the arm, or he charges teeth bared when you try to lunge him. He is sending you a message, loud and clear! He sees himself as dominant and is telling you no!  If you let this continue, his behavior could escalate quickly to include striking and kicking at you.

It’s time to learn how to effectively control him on the ground and earn his respect. I recommend watching some trainers’ videos on Youtube to learn about ground work. There are many different ways to earn your horse’s respect through ground work. I personally like Pat Parelli’s Seven Games to gain control of a disrespectful horse. They are broken down into small understandable steps. I don’t follow his methods exclusively, and I think everyone should use the techniques that feel natural to them. Once you  find a method you like, take a break from riding for a week or so. Work on these new skills with your horse. Any time he acts aggressively, ask him to back quickly out of your space. Most horses will become model citizens with consistent ground work. If you still feel like your life is in danger and his behavior doesn’t improve, please contact a professional trainer for help.

Play

Sometimes young horses try to play with us like they would their equine counterparts. They naturally nip and play with each other in the pasture, and they may try to do the same with us. They should simply be asked to do something else when the attempt to play with us roughly. Put their mind to work on something else and it will end their silliness. Most horse will outgrow this tendency in time. The key is not to turn this innocent behavior into a negative experience for the horse. If they tend to try nipping, back them out of your personal space when they act frisky.

Hopefully these methods can help you and your horse get closer to those dreams you had in the beginning of your horse owning experience.

How to Make an Easy DIY Bridle for Your Horse

Today I thought I would share a quick and easy DIY  bridle project with everyone. If you can braid, you can make this bridle! The materials are inexpensive, and the colors combinations are endless! What’s not to love?


This is my go-to bridle when riding in my Little S hackamore or Combination bit. It’s simple to use, adjust, and it’s ideal for any bit or bitless option with a noseband and curb strap. However, it isn’t advisable to use this bridle with any bit without a noseband. Since it lacks a throat latch and browband, it needs the noseband and curb strap for stability.

First, what you will need for this project:

( 2 ) 50 ft. 550 paracord bundles in the primary color of your choice – I chose black because it matches my saddles. You can find paracord in stores and online in an amazing selection of colors. The turquoise and black bridle is made with reflective paracord. It is great for riding in the morning or evening hours, as it will increase visibility for cars. You can find reflective paracord here:  http://amzn.to/2wEIBBC

( 2 ) 18 ft. 550 paracord bundles in secondary color of choice (or one more 50 ft bundle, Walmart didn’t have any colors in 50 ft. bundles) – I chose tie-dye because this bridle will be used by my daughter.

( 4 )  3/4 inch Conway buckles – I purchased a bag of 25 from my local feed store years ago for under $20. You can find them at farm stores and online as well. The ones I used are Stainless Steel. I found a 4 pack online here: http://amzn.to/2vge8Mu

( 2 ) Chip bag clips – You know, the little plastic things you use to seal the bags of snack food. I got these from Ikea.

( 1 )  Torch lighter. You find these near the cookout supplies at the average store. The one I purchased actually had a torch flame, not just a lighter-style flame. This makes a huge difference when finishing the ends of the paracord.

( 1 ) pair of needle-nose pliers.

( 1 ) pair scissors.

( 1 ) Tape measure or Tailor Tape. You can find an inexpensive one in the sewing supplies of some stores or online here: http://amzn.to/2fpY0m7

Here is a picture of most of the supplies needed ( Not pictured is a second clip, the tape measure or tailor tape, and scissors).

Before you start, you must preshrink the paracord. It will shrink later when it gets wet if you don’t.  Simply remove any plastic wrapping or labels, then submerge the cord in hot water for about 10 to 20 minutes.  Let it dry on a towel for a few hours after soaking. It doesn’t have to be entirely dried before you start working with it, but I prefer it to be mostly dry.

Headstall

I originally made this bridle because my Rocky Mountain Horse gelding has a narrow and petite head. His favorite bit also happens to be a Myler Combination bit. Even a Cob sized bridle proved too big because this bit had to sit higher in his mouth. It was frustrating punching holes in brand new bridles, and my budget was pretty limited.

I had a friend who made paracord bracelets, so decided to play around with some. After a little  experimenting, I finally made a simple, but sturdy,  design for my day to day riding needs. I also made one for my Spotted Saddle Horse gelding who uses a Little S Hackamore. I use this bridle every time I ride him.

For this DIY demo, I am making the simple headstall first. You will need ( 6 ) strands of paracord six feet long each. ( It will probably end up being a little too long, but that allows you to tailor the size to your individual horse later. )  Any color combination can be used, but it will affect the finished pattern. I used this pattern:

As you see in the picture, you use the clip to hold the paracord in a neat line. Now you just braid! While you work, the tails of the cord may get a little tangled. Take a moment and untangle them as you go. If you need to take a break,  use the second clip to hold your place. Here is what the braid  looks like:

Then this:

After you finish braiding, clamp the other end. Now it’s time to burn the ends of the paracord to prevent fraying. You will need the torch lighter, scissors, and needle-nose pliers. Trim the ends even with the scissors, then burn them with the lighter like below:

While the ends are still very hot ( sometimes even on fire a little, lol ), clamp them together with the pliers and hold for about 30 seconds. This might take a few attempts to get right. Your goal is to make an end that is fused and will fit through the conway buckle. The finished end  looks something like this:

Now, set it aside and start on your reins. You will finish assembling the headstall when both parts are done.

The Reins

For the reins you need ( 6 ) strands of paracord 12.5 ft long. Again, you can use any pattern you want.  I tend to use mostly black with some color since the reins seem to show dirt faster than the headstall. Paracord does wash off with a little soap and water though.

The method is exactly like the headstall, so once you have the reins braided, cut and burn the ends. You can slide the conway buckles on the rein ends. I like to use about 5 or 6 inches of the finished braid to loop it securely in the buckle. Your buckle should look like this when put on correctly : (of course you want to attach the bit or hackamore to it, I didn’t to provide better closeup pictures).

Make sure the little hook in the middle shows through the paracord to keep the braid from slipping and the finished ends  are all the way through the buckle to secure it well. Sometimes while pulling the ends through, a strand  breaks apart where you burned them together. It’s no big deal, simply burn it back to the others strands again. The second picture shows the side that should be facing the outside of your rein, so that the inside of the buckle hides the finished end. Your reins should be around 9 feet long, but you can alter the length easily by cutting off the excess and burning the ends like before.

Now time to adjust the headstall. There are two ways to do this depending on the availability of your horse. If you live with your horse, simply use him to get a rough measurement of the size needed for the headstall. Remember to add 5 to 6 inches on each side for the conway buckles. Once you have used your horse’s head to get a rough estimate of the length needed,  measure it out on the headstall. Then you can cut and refinish one side as you did earlier.

The other way uses your horse’s current bridle to get a rough estimate. Again remember to add 5 to 6 inches to each side for the conway buckles. After you assemble the bit or hackamore on the finished headstall, it is time to try it on! Your bridle should look something like this:

I didn’t use the reins on this bridle because my daughter prefers these rope reins. You will also notice the bit was sitting a little too low in his mouth and the noseband was too low also. This was the first time I was trying on this bridle. It started pouring rain before I could adjust it and take another picture. Whiskey was not ridden with the bit that low on in his mouth. Here’s another bridle I just made being tried on Indy that same day:

This one was also too low on his nose,  and was adjusted inside while it was pouring rain!

So there you have it! A simple bridle that anyone can make in an afternoon. These make great personalized gifts for the horse lovers in your life. They are also inexpensive enough to have several different colors hanging around to change up your horse’s look. Hope you enjoyed this tutorial and love your new bridle!


Verified by MonsterInsights